Generating Synthetic Data
If you wish to evaluate your LLM application at a higher test coverage, you can either curate your own dataset, or synthetically generate one instead. Since manually writing test data is time-consuming and often times not as comprehensive, we’ll be starting with generating a synthetic evaluation dataset to evaluate our medical chatbot at scale.
deepeval's Synthesizer provides a quick and easy way to generate high-quality goldens (input, expected output, context) for your evaluation datasets in just a few lines of code.
In this tutorial, we’ll demonstrate how to generate synthetic datasets for our medical chatbot using 2 approaches:
Generating From Documents
First, we'll be generating a synthetic dataset from our knowledge base document, the Gale Encyclopedia of Medicine. Generating synthetic data from documents is especially useful if you're testing RAG applications or tools.
When generating from documents, the Synthesizer first extracts contexts from the documents, before generating the corresponding inputs and expected outputs.
Let's begin by generating synthetic data for a typical use case for our medical chatbot: patients seeking diagnosis. We'll first need to define the styling configurations that will allow us to mimic this user behaviour.
You can optionally customize the output style and format of any input and/or expected_output in your synthetic goldens, by configuring a StylingConfig object, which will be passed into your Synthesizer.
from deepeval.synthesizer.config import StylingConfig

styling_config = StylingConfig(
    expected_output="Ensure the output resembles a medical chatbot tasked with diagnosing a patient’s illness. It should pose additional questions if the details are inadequate or provide a diagnosis when the input is sufficiently detailed.",
    input_format="Mimic the kind of queries or statements a patient might share with a medical chatbot when seeking a diagnosis.",
    task="The chatbot acts as a specialist in medical diagnosis, integrated with a patient scheduling system. It manages tasks in a sequence to ensure precise and effective appointment setting and diagnosis processing.",
    scenario="Non-medical patients describing symptoms to seek a diagnosis.",
)
In addition to styling, DeepEval lets you customize other parts of the generation process, from context construction to data evolutions.
Goldens Generation
With our configurations defined, let’s finally begin generating synthetic goldens. You can generate as many goldens_per_context as you’d like. For this tutorial, we’ll set this parameter to 2, as coverage across different contexts is more important.
We'll be generating our goldens through DeepEval's EvaluationDataset, but this can also be accomplished with the Synthesizer directly.
dataset=EvaluationDataset()
dataset.generate_goldens_from_docs(
  max_goldens_per_context=2,
  document_paths=["./synthesizer_data/encyclopedia.pdf"],
  synthesizer=synthesizer
)

print(dataset.goldens[0])
Let's take a look at an example golden we've generated.
Golden(
  input='''
    I have been experiencing symptoms of oral thrush. Could this be related
    to other underlying health issues?''',
  expected_output='''
    Experiencing oral thrush can indeed be an indication of underlying health
    issues. It is often seen in individuals with weakened immune systems. To
    better understand your situation, could you provide more information about
    any other symptoms you might be experiencing, such as fever, weight loss,
    or persistent fatigue?''',
  context=["The general physical examination may\nrange from normal findin..."]
  ...
)
You can see that even though the input for this synthetic golden is simple, it remains relevant and aligns with our expected user behavior.
You can increase the complexity of the generated goldens by configuring the evolution settings when initializing the Synthesizer object.
Additional Customizations
It's also important to be exploring additional styling configurations when generating your datasets. Using multiple styling configurations allows you to generate a truly diverse dataset that is not only comprehensvie but also captures edge cases.
Ambiguous Inputs
For example, you may want to generate synthetic goldens where users describe borderline symptoms—providing enough detail to narrow options but insufficient for a definitive diagnosis. This tests the chatbot's ability to handle ambiguity and ask clarifying questions.
styling_config_ambiguous = StylingConfig(
    expected_output="Provide a cautious and detailed response to borderline or ambiguous symptoms. The chatbot should ask clarifying questions when necessary to avoid making unsupported conclusions.",
    input_format="Simulate user inputs that describe borderline symptoms, where the details are vague or insufficient for a definitive diagnosis.",
    task="The chatbot acts as a specialist in medical diagnosis, integrated with a patient scheduling system. It manages tasks in a sequence to ensure precise and effective appointment setting and diagnosis processing.",
    scenario="Non-medical patients describing symptoms that are vague or ambiguous, requiring further clarification from the chatbot."
)
In medical use cases, false positives are generally preferred over false negatives. It's essential to consider your specific use case and the expected behavior of your LLM application when exploring different styling configurations.
Challenging User Scenarios
In another scenario, you may want to test how your chatbot reacts to users who are rude or in a hurry. This allows you to evaluate its ability to maintain professionalism and provide effective responses under challenging circumstances. Below is an example styling configuration:
styling_config_challenging = StylingConfig(
    expected_output="Respond politely and remain professional, even when the user is rude or impatient. The chatbot should maintain a calm and empathetic tone while providing clear and actionable advice.",
    input_format="Simulate users being rushed, frustrated, or disrespectful in their queries.",
    task="The chatbot acts as a specialist in medical diagnosis, integrated with a patient scheduling system. It manages tasks in a sequence to ensure precise and effective appointment setting and diagnosis processing.",
    scenario="Users who are impatient, stressed, or rude but require medical assistance and advice."
)
High Quality Configurations
For high-priority use cases, you may want to define higher-quality filters to ensure that the generated dataset meets rigorous standards. While this approach might cost more to generate the same number of goldens, the trade-off can be invaluable for critical applications. Here’s an example of how you can define such quality filters:
from deepeval.synthesizer.config import FiltrationConfig
from deepeval.synthesizer import Synthesizer

filtration_config = FiltrationConfig(
    critic_model="gpt-4o",  # Model used to assess the quality of generated data
    synthetic_input_quality_threshold=0.8  # Minimum acceptable quality score for generated inputs
)
synthesizer = Synthesizer(filtration_config=filtration_config)
You might want to push different evaluation datasets for various configurations to the platform. To do so, simply push the new dataset under a different name:
dataest.push(alias="Ambiguous Synthetic Test")
Generating Synthetic Data Without Context
Generating synthetic data from documents requires a knowledge base, meaning the generated goldens are designed to test user queries that prompt the LLM to use the RAG engine. However, since our medical chatbot operates as an Agentic RAG, there are cases where the LLM does not invoke the RAG tool, necessitating the generation of data from scratch without any context.
Customizing Style
Similar to generating from documents, you'll want to customize the output style and format of any input and/or expected_output when generating synthetic goldens from scratch. When generating from scratch, your creativity is your limit. You can test your LLM for any interaction you can foresee. In the example below, we'll define user inputs to try to book an appointment by providing name information and email.
from deepeval.synthesizer.config import StylingConfig

styling_config = StylingConfig(
    input_format="User inputs including name and email information for appointment booking.",
    expected_output_format="Structured chatbot response to confirm appointment details.",
    task="The chatbot acts as a specialist in medical diagnosis, integrated with a patient scheduling system. It manages tasks in a sequence to ensure precise and effective appointment setting and diagnosis processing.",
    scenario="Non-medical patients describing symptoms to seek a diagnosis."
)
Alternatively, you can also just make the patient say a greeting to the chatbot.
styling_config = StylingConfig(
    input_format="Simple greeting from the user to start interaction with the chatbot.",
    expected_output_format="Chatbot's friendly acknowledgment and readiness to assist.",
    task="The chatbot acts as a specialist in medical diagnosis, integrated with a patient scheduling system. It manages tasks in a sequence to ensure precise and effective appointment setting and diagnosis processing.",
    scenario="A patient greeting the chatbot to initiate an interaction."
)
Generating Goldens
The next step is to simply initialize your synthesizer with the styling configurations and push the dataset to Confident AI for review.
from deepeval.synthesizer import Synthesizer

# Initialize synthesizer for appointment booking
synthesizer = Synthesizer(styling_config=styling_config)
synthesizer.generate_goldens_from_scratch(num_goldens=25)
dataset.push("Synthetic Test from Scratch")
The reason the expected_output works better in synthetic generation pipelines is because it is hyper-focused on a specific task or topic. In contrast, a typical LLM application operates with a broader system prompt or fine-tuning, making it less precise for handling specific queries.
Dataset Review
While DeepEval offers the ability to control quality filtration configurations for synthetic data generation, manual dataset review remains crucial, especially if you have domain experts. In this section, we’ll push our first synthetic dataset (patients seeking diagnosis) to Confident AI for review.
Pushing your Dataset
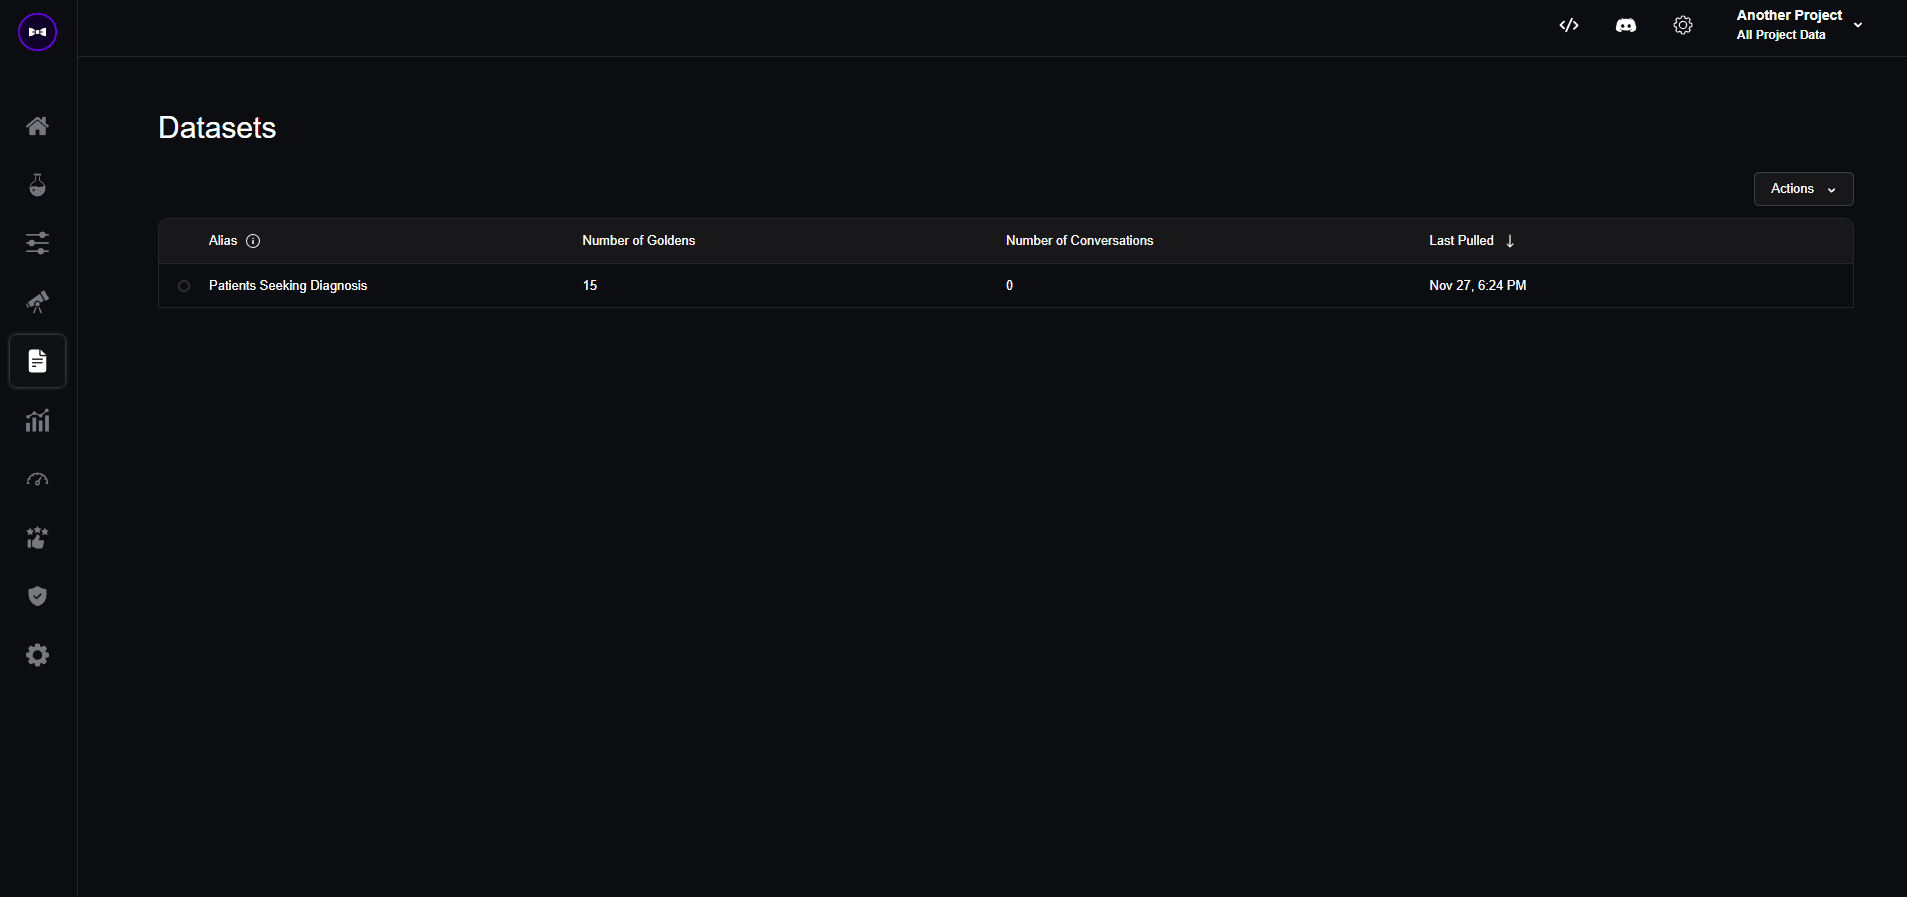
To push your dataset to Confident AI, simply provide an alias (dataset name) and call the push method on the dataset. Optionally, you can use the overwrite parameter to replace an existing dataset with the same alias if it has already been pushed.
dataset.push(alias="Patients Seeking Diagnosis", overwrite=False)
Once your code finishes running, you'll be redirected to the following datasets page.
Reviewing your Dataset
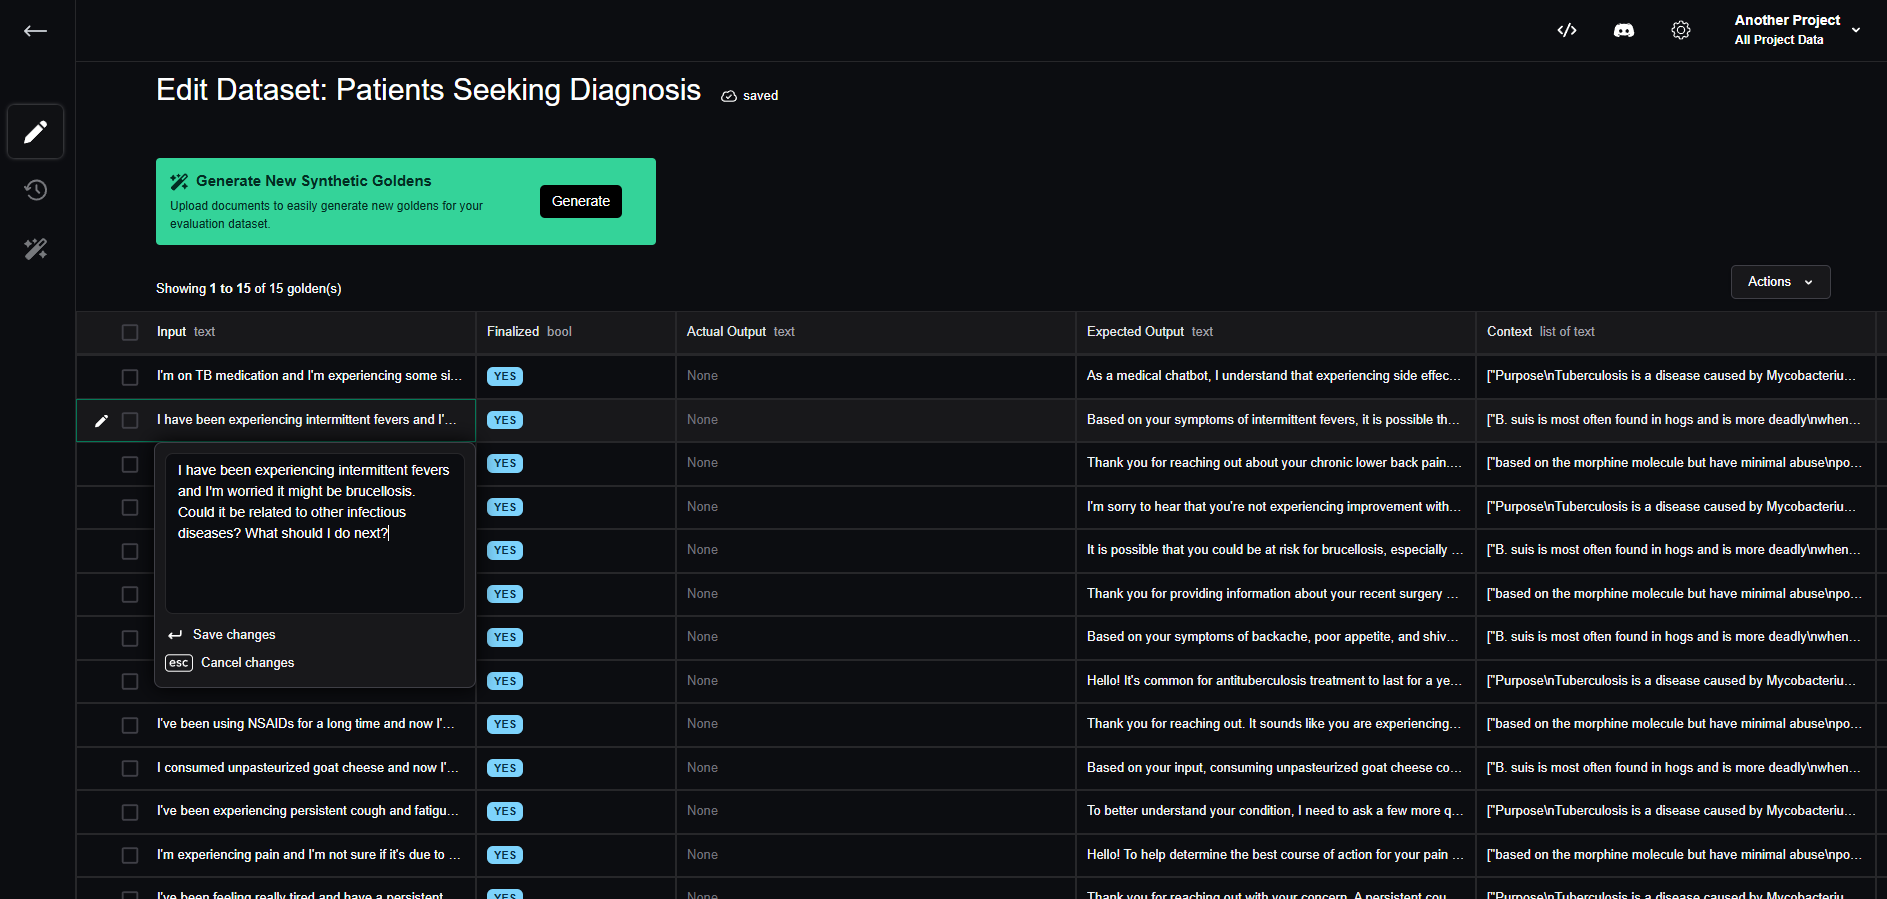
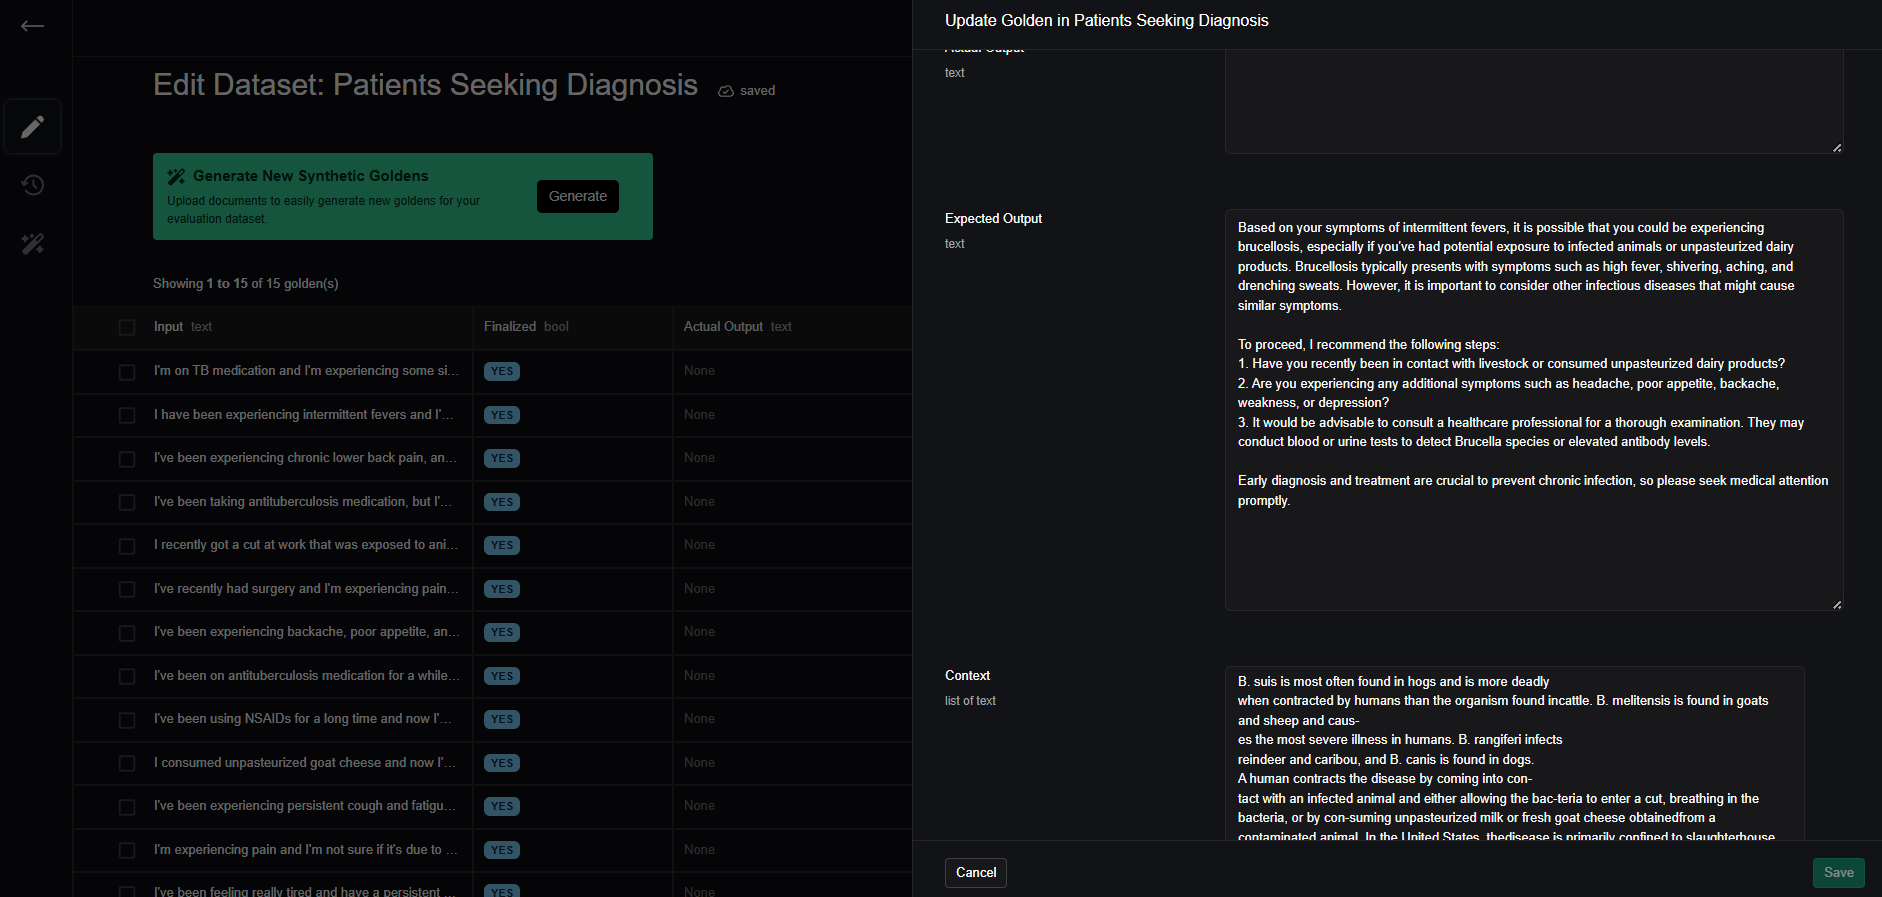
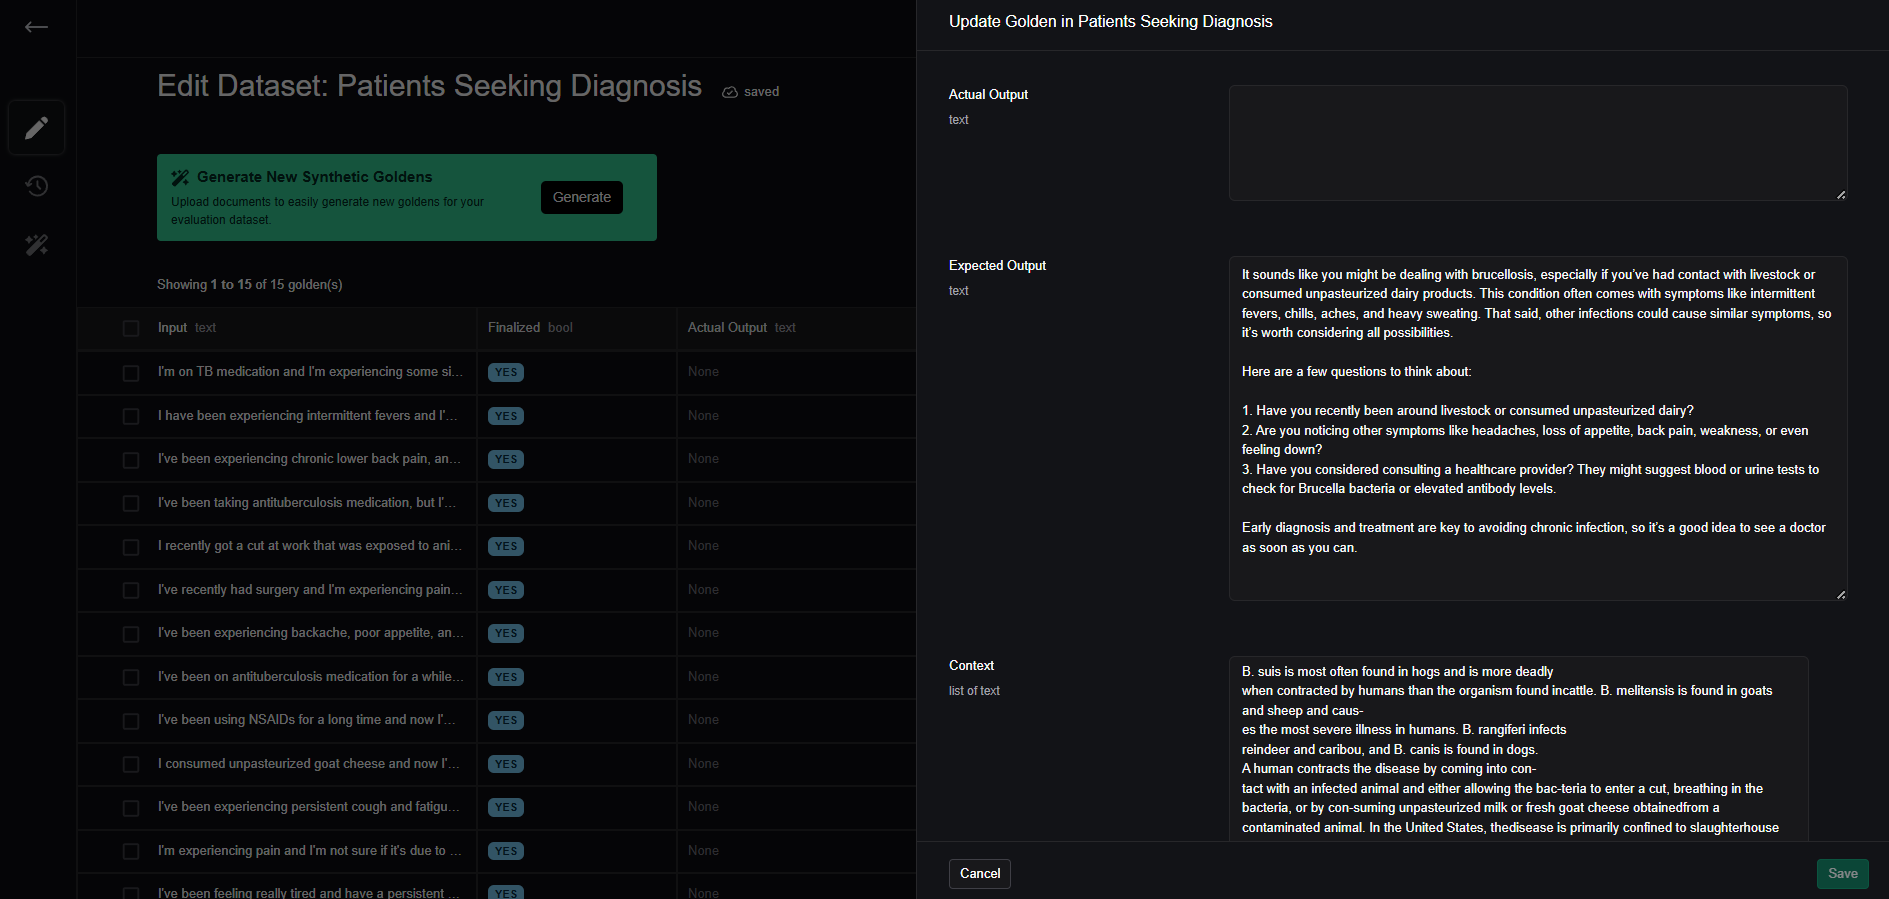
To inspect the goldens individually, click on the dataset you're interested in reviewing. To explore a specific golden in more detail, hover over the cell or click the pen icon on the left of the row to open the side panel for a closer look. We'll be focusing on this specific golden on the 2nd row.
Examining this interaction, you’ll notice that the chatbot’s expected output isn’t ideal. Although it addresses the user, it suggests “steps” that are actually questions rather than actionable guidance, which reads a little bit odd within the context of the iteraction.
Generating a dataset and reviewing these test cases can inspire new ideas for evaluation criteria and metrics to include in your workflow.
Since this golden needs revision, let’s toggle off the "Finalized" status to indicate to our human reviewers that this test case isn’t finalized. Additionally, we can leave a comment suggesting that the expected output needs revision.
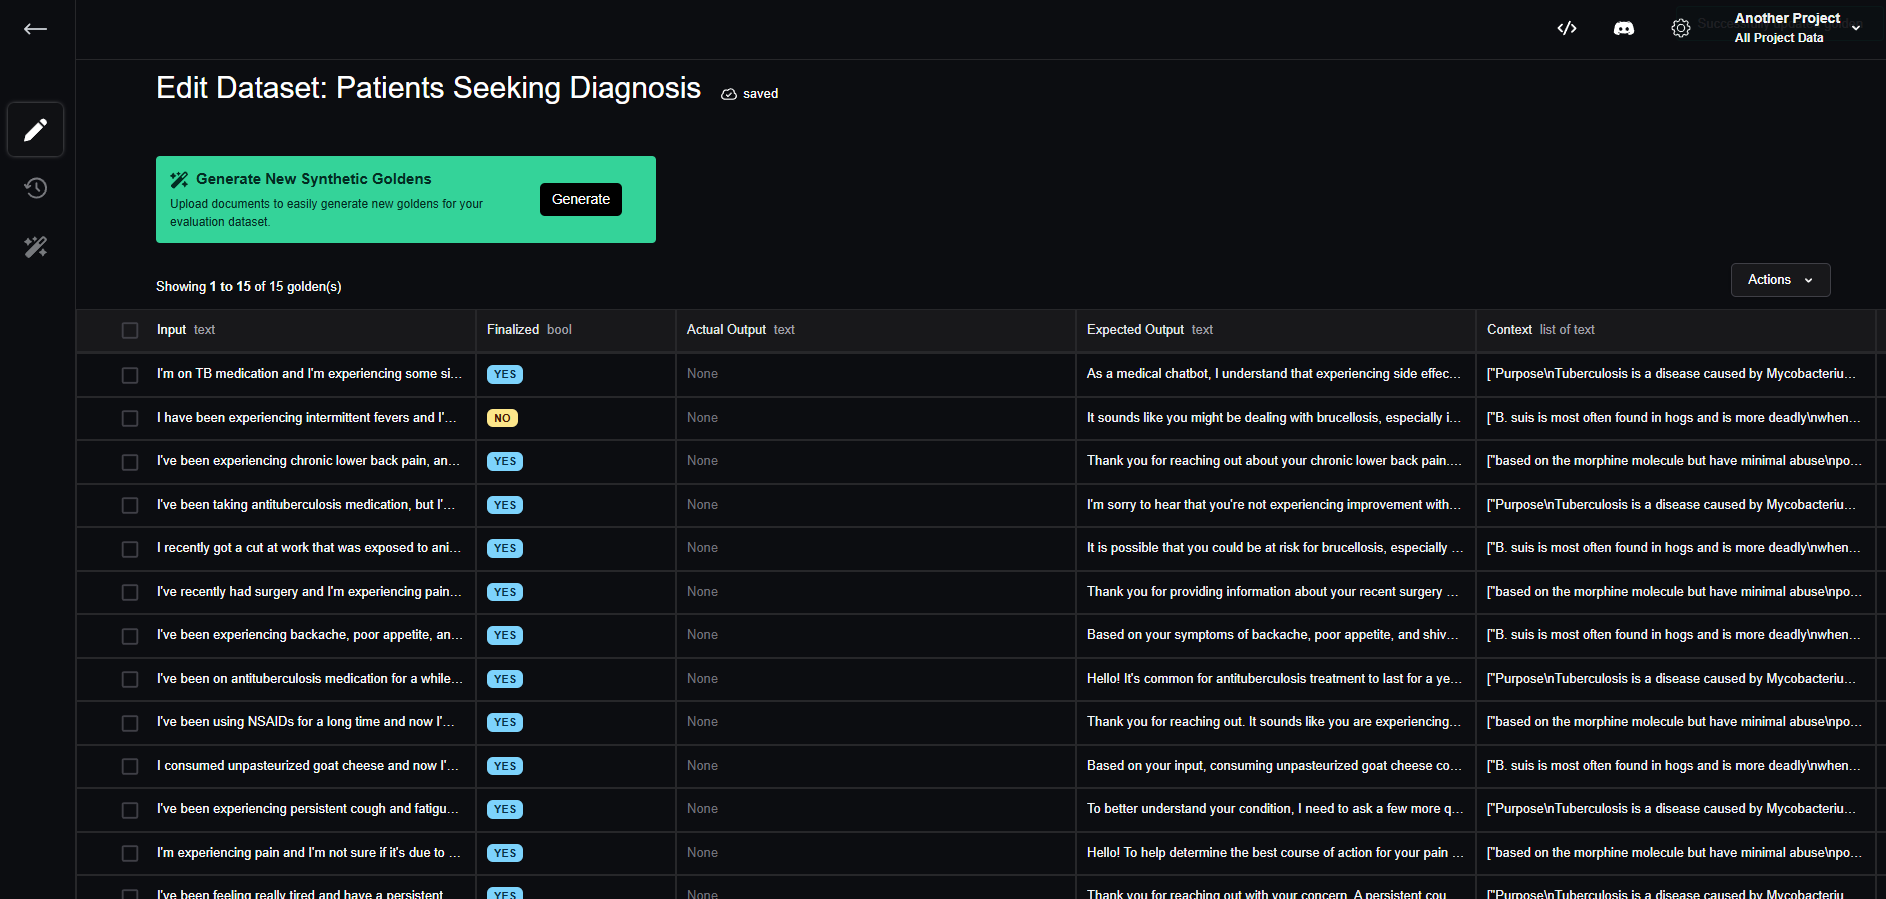
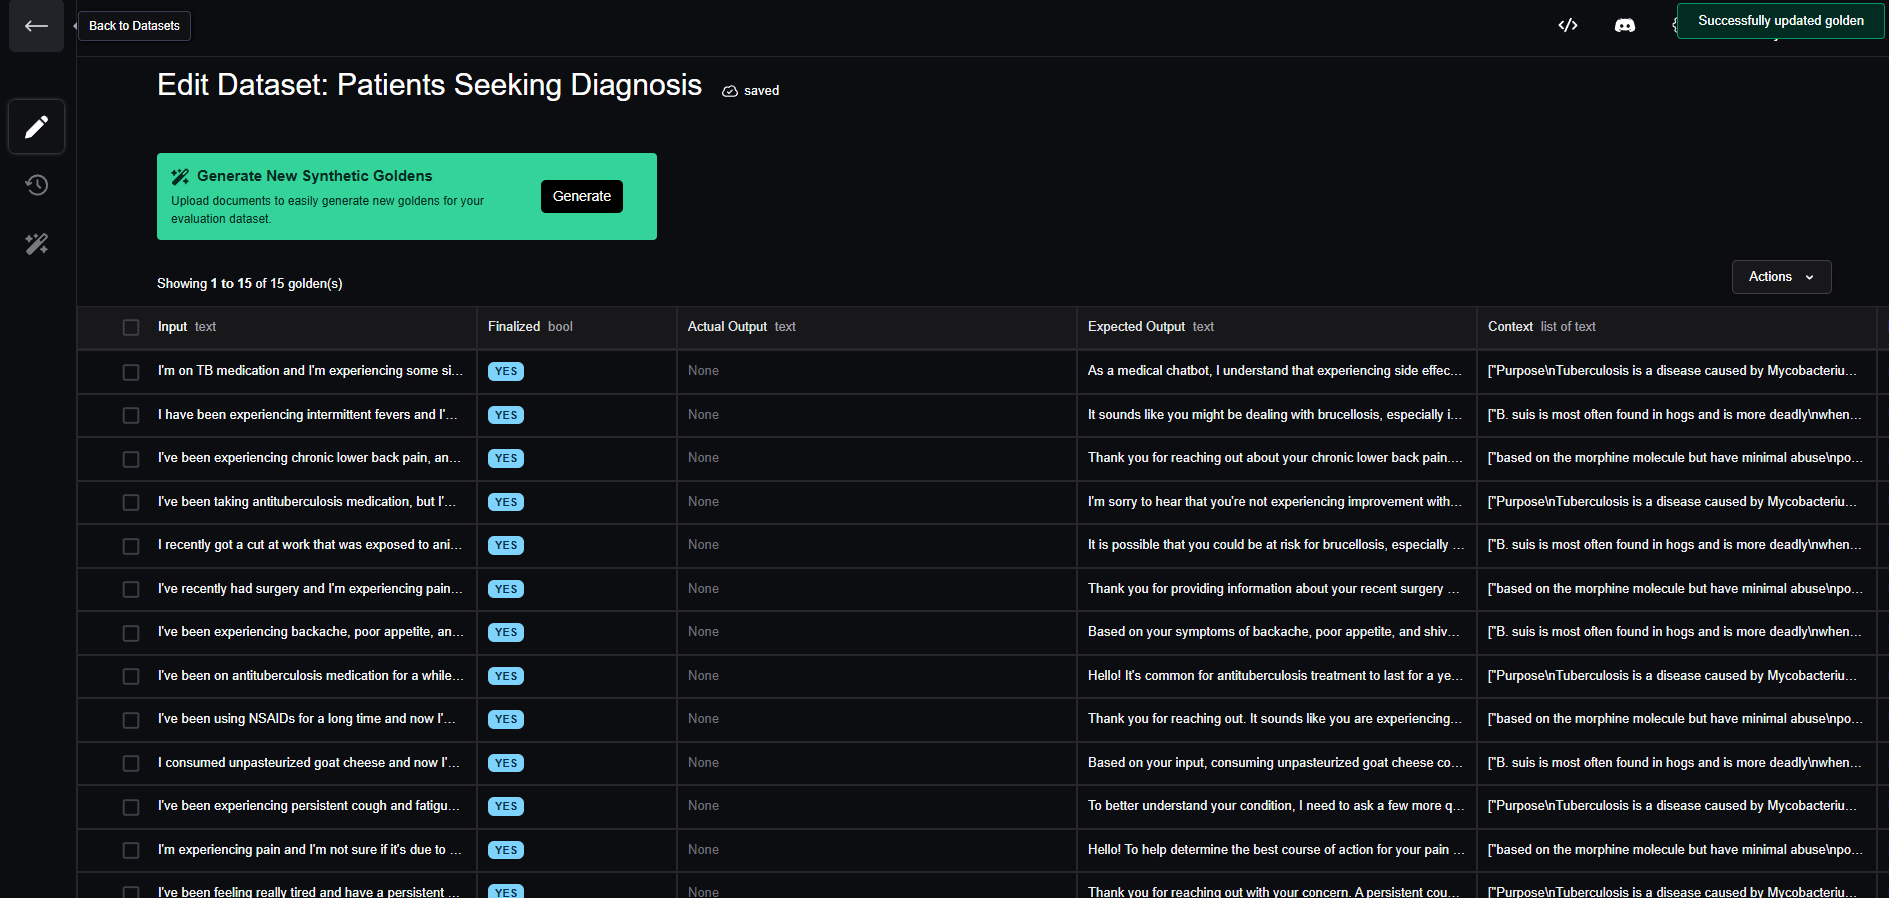
Once reviewers inspect the dataset, they can review goldens that aren’t finalized and make revisions based on the provided comments.
Finally, they’ll need to toggle the Finalized status to let engineers know this dataset is ready to pull.
Summary
In this section, we covered how to generate synthetic datasets for our medical chatbot and push them to Confident AI for review. In the next section, we’ll be pulling the revised dataset from Confident AI and run evaluations on the updated data.